Borderlands 4 Deathright Order Silo Guide, How to Claim Command Console and Unlock Fast Travel

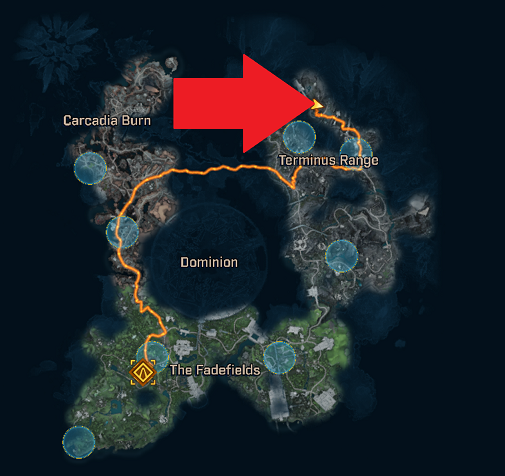
In Borderlands 4 Guides, navigating the frozen landscapes of the Deathright area can be tricky, especially when icons mislead players. The Borderlands 4 Deathright order silo guide reveals that unlocking the DeathRight Order silo requires heading northwest from your starting point in the icy region.
Borderlands 4 Deathright Location:
As you progress, you'll encounter an ice river that demands crossing, marking a key step in the Borderlands 4 Deathright Walkthrough. Once across, an icy waterfall comes into view, serving as your landmark for the next phase.
Approach the left side of this icy waterfall and carefully cross over the frozen surface to avoid slipping hazards common in Borderlands 4's environmental challenges. From there, spot the grapple point ahead, which allows you to swing across to a nearby ledge.
After grappling, glide over to the ledge and begin climbing. Scale the first ledge, then continue upward to the next one, building momentum in your ascent during this Borderlands 4 Deathright claim command console sequence.
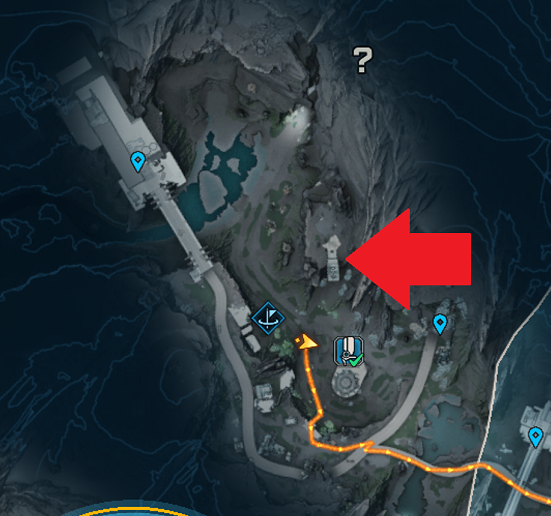
Climb another ledge higher up, and soon a building will become visible in the distance. Make your way toward that structure, as it houses the essential command console.
The Borderlands 4 Deathright command console location inside this building is where you interact to capture it, thereby unlocking the DeathRight Order silo and enabling fast travel options to this outpost for quicker returns in future runs.
Enter the building, approach the console, and activate the capture prompt that appears on screen. With the console claimed, the silo unlocks immediately, integrating it into your map for seamless access.